Guides / Basic Staff Walkthrough
How to remove or delete patients in CHIME
Sometimes, you may need to remove a patient from the schedule or delete an existing appointment. There are two ways to do this.
Removing a patient who has NOT checked in yet
Hover over the patient’s name in the Scheduled for Today queue. On the left side of the patient’s name, click the red x.
Removing a patient who has already checked in
Click on the patient’s appointment in the schedule.
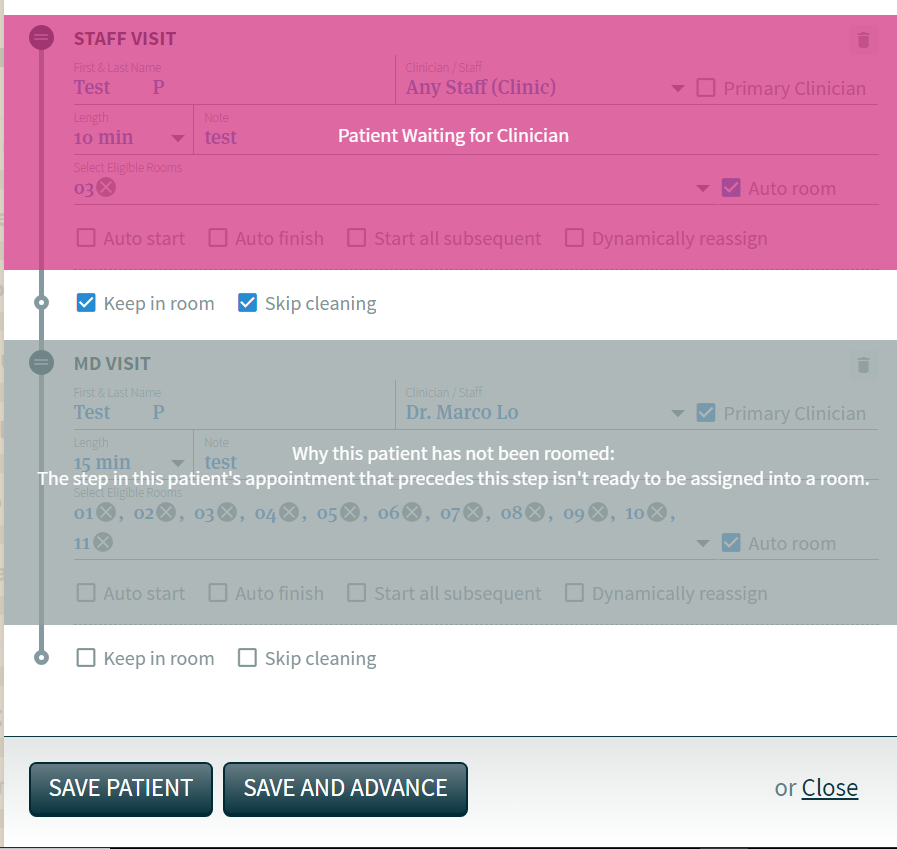
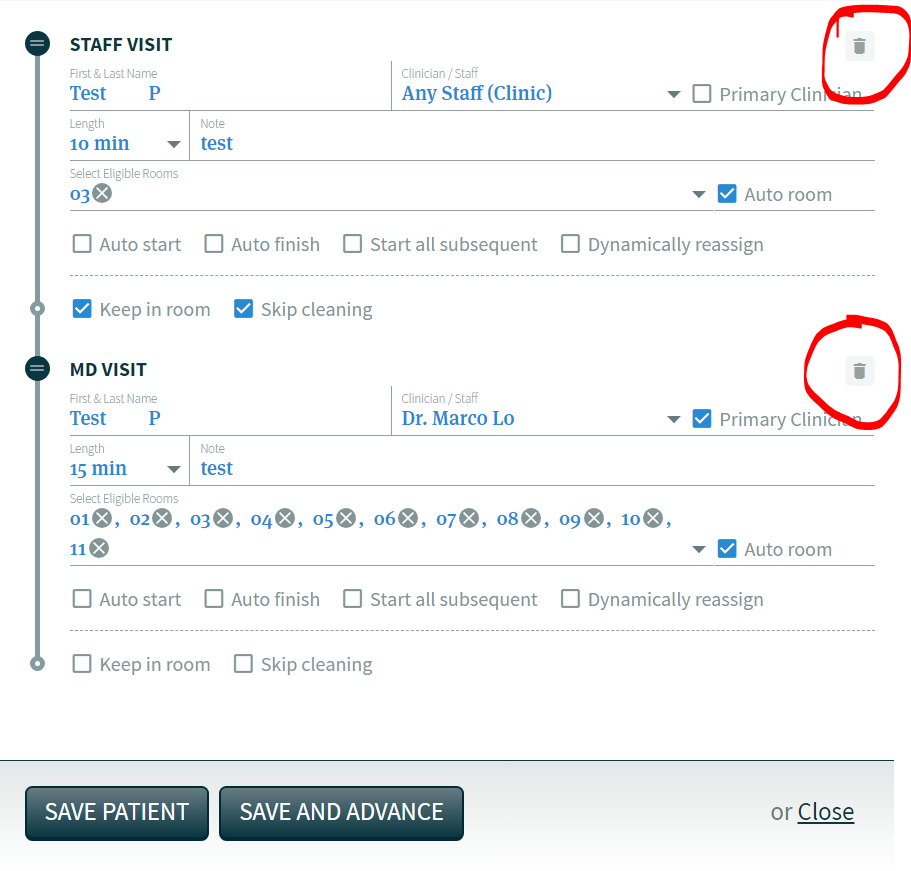
You’ll get a popup that looks something like screenshots
Click the trash bin on the right side of the appointment
If the appointment is covered by an overlay, you may need to click on each section to access the trash bin icon. In the example in the second image, you would click anywhere in the pink or grey sections.
NOTE: if the subvisit is already marked as “completed” you won’t be able to access the trash bin icon. This is ok - you only have to delete the incomplete subvisits to remove the patient..
When you’ve removed all of the incomplete visits, the button at the bottom of the popup will either say “Save and Advance” or “Delete Patient.” Either of these options will remove the patient from CHIME.
This action can’t be undone, so be sure that you want to remove the patient’s appointment entirely before you proceed.


