Making Yourself Available or Unavailable in CHIME
Your CHIME status, such as Available Onsite or Available Offsite, will effect how your patients are roomed. For example, CHIME will not auto-room to an in-clinic room if you are Available Offsite, and will instead prefer your virtual room.
If you are Not Available, this will effect whether or not your patients are able to check in for their appointment. The status Available Onsite or Available Offsite will be set for you automatically by CHIME, 15 minutes before your first appointment of the day. CHIME determines your status by looking at your full list of appointments, then setting you to Available Onsite if you have in-person appointments, or in-person and virtual appointments mixed. If you only have virtual appointments, you’re set to Available Offsite.
You may want to change this status manually sometimes, such as setting yourself to Not Available when you’re done at the end of the day. If your status is “Not Available”, your patients will not be able to check-in. This prevents patients from checking in remotely after you have already signed out.
If you are going to be working in-clinic, your status should be “Available Onsite.”
If you are going to be working somewhere without a chime tablet (your home office, or an office in-clinic with no tablet for example), your status should be “Available Offsite”
Set your status to “Not Available” when you’re done seeing patients for the day.
To change your status:
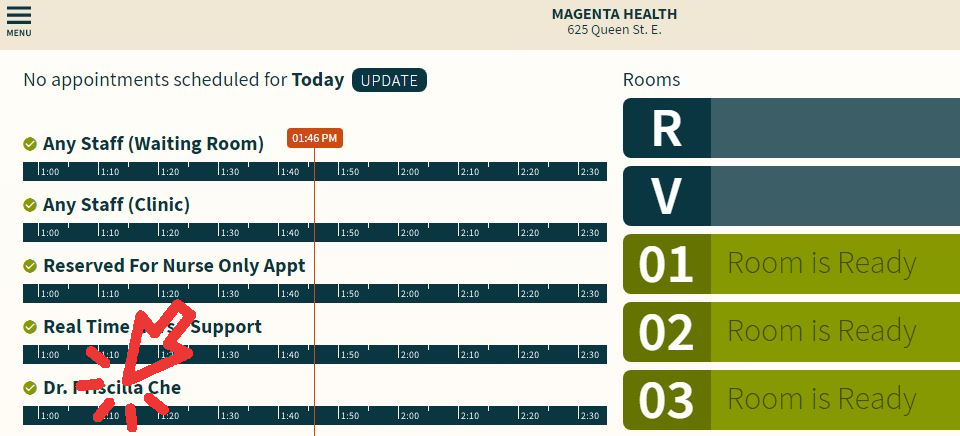
Click on your name in CHIME
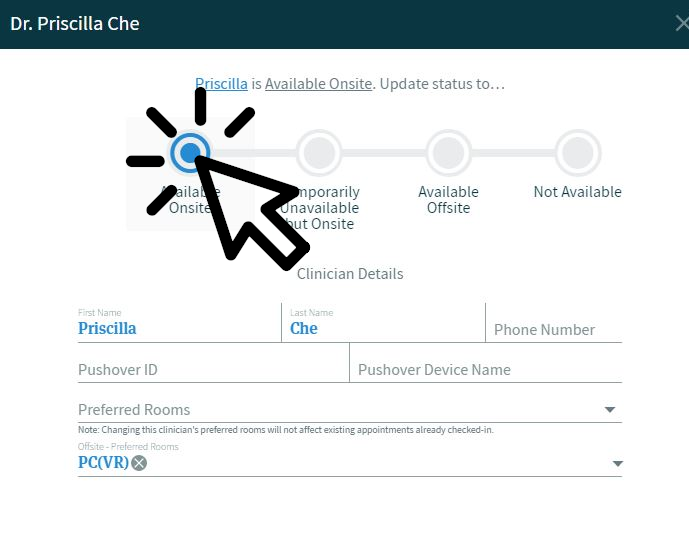
2. Choose a Status at the top of the popup
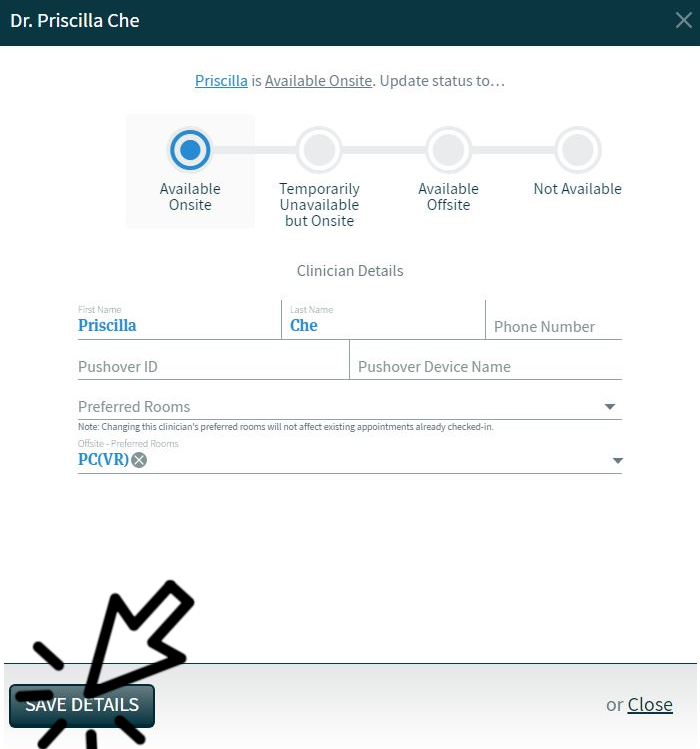
3. Click Save Details


