Guides / Importing Appointments
Importing EMR Appointments into CHIME
While it’s possible to add patients into CHIME manually, 99% of appointments are imported from an EMR via some form of EMR integration. Here’s how it works!
Step 1 — Accessing EMR Appointment Data
Our goal is to always work with how clinics currently store each day’s appointment data within their own existing EMR. This will be slightly different from EMR to EMR, but in general, we expect to see information for each appointment such as:
appointment status
appointment start date and time
appointment duration
appointment reason
clinician name
patient name
To better understand what information we will be able to access in respect of your specific EMR, we have created these webpages for common EMRs: OSCAR Pro, Telus PS, Accuro QHR, Telus CHR.
We access this data through multiple methods of EMR integration.
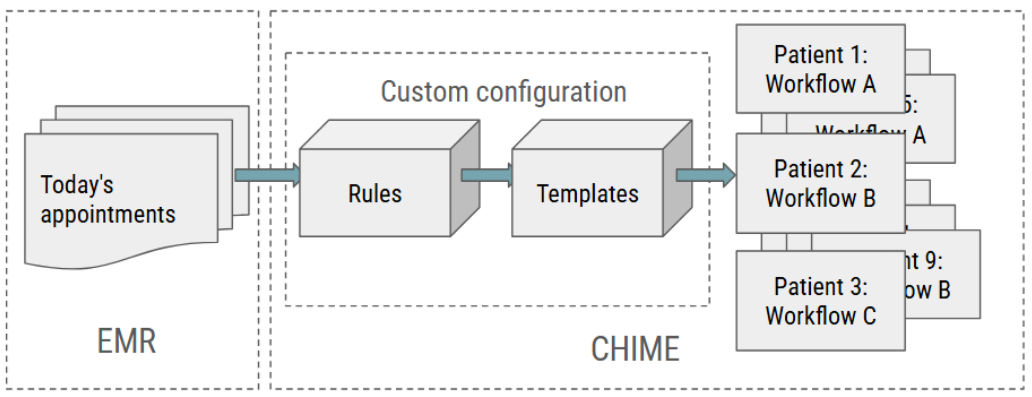
Step 2 — Applying Rules
Once CHIME has received the data via EMR integration, we look at every appointment carefully, examining every piece of data available to us.
For each appointment, we compare it to a set of rules in order to choose an appropriate template to us. We create these rules in close collaboration with each clinic.
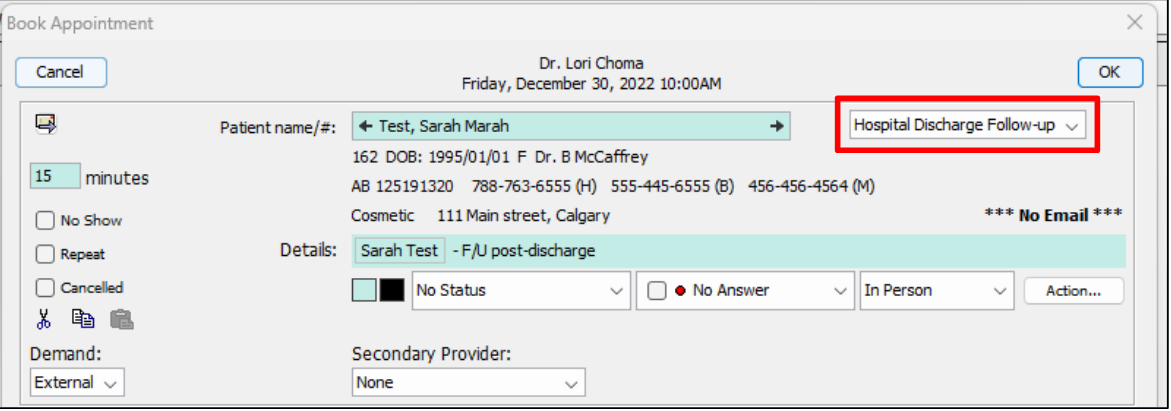
For example, TELUS PS appointments have “appointment types”. We might have the rule that if the “appointment type is “Hospital Discharge Follow-up”, then we would use a Follow-up Template for that appointment.
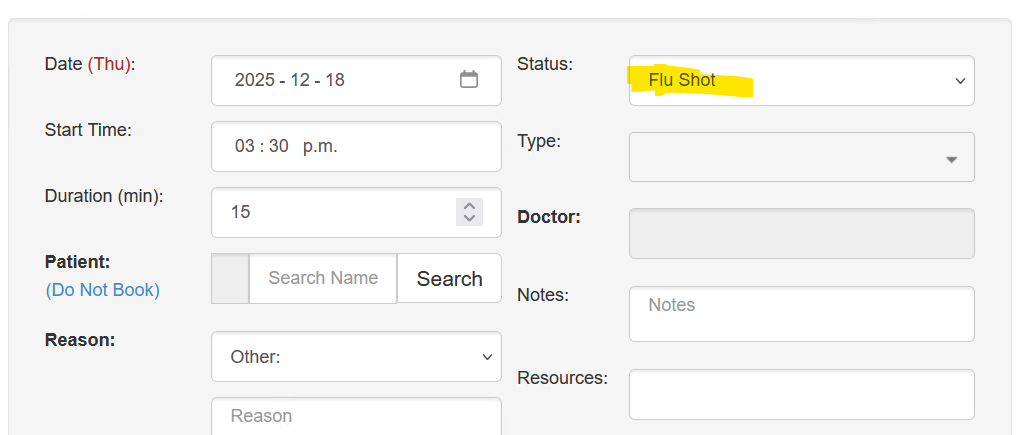
For example, OSCAR Pro appointments have “status”. We might have the rule that if the status is “Flu Shot”, then we would use a Flu Shot Template for that appointment.
It’s possible to get extremely nuanced in these rules because these rules can examine every part of the appointment data (e.g. use Template 1 for a MD on Wednesdays, use Template 2 for a MD on Thursdays), but in general, we work with clients to construct a thoughtful but simple set of rules.
It’s also possible for the rules to examine the free-text reasons or notes entered by staff or patients, but this will require some collaboration and change management to limit errors.
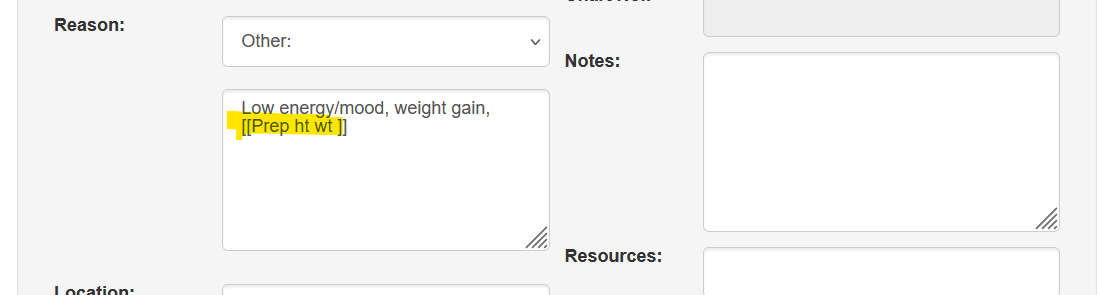
For example, a patient or staff might write “Low energy / mood, weight gain”. Attempting to automatically predict that taking the patients height and weight is appropriate is difficult. However, staff adding a notation such as “[Prep HT/WT]” into the free-text reason is workable.
Step 3 — Applying Templates
Once a rule has been found to apply to a particular appointment, we use a template to create a workflow within CHIME for that particular appointment.
A clinic might have a dozen or more templates, corresponding to different situations and circumstances. Fewer is better though, from a long-term management perspective.
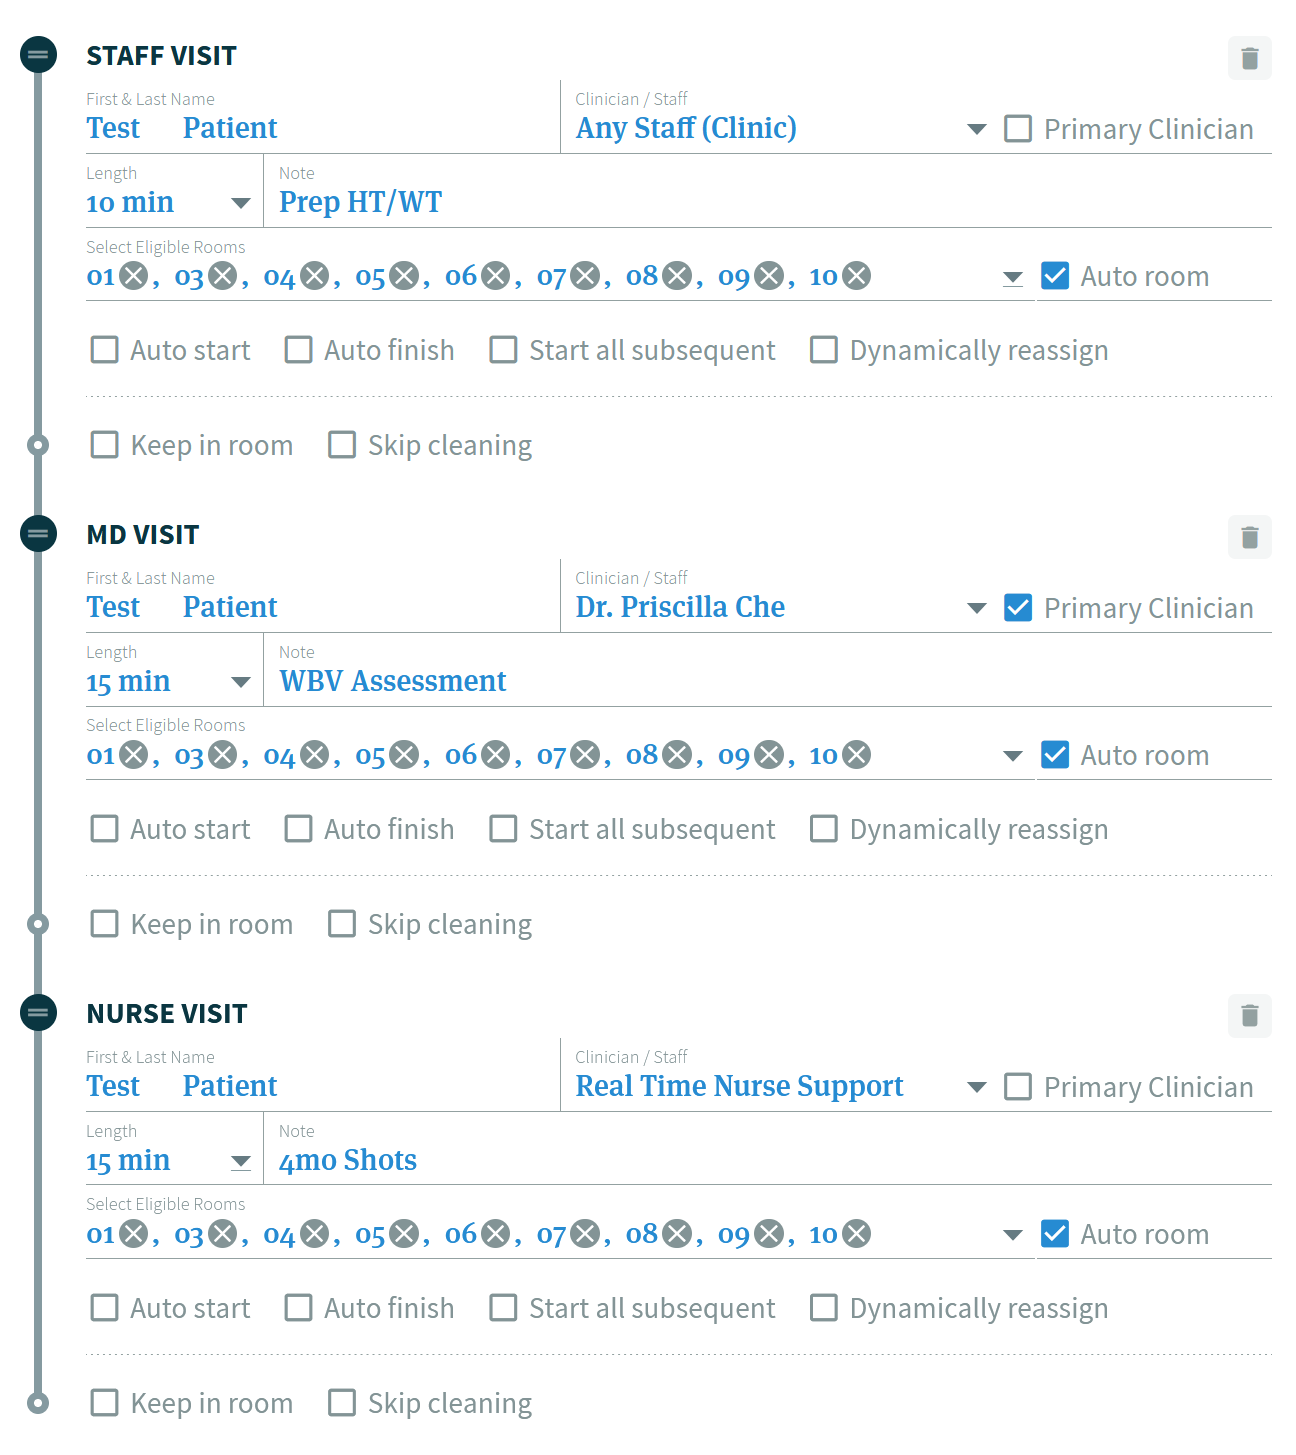
Each template might be completely different. For example, a Well Baby Visit template might involve three steps with three different staff members:
Prep by a medical assistant (e.g. ht/wt)
Assessment with physician
Shots with nurse
In contrast, many standard physician appointments will only have 1 or 2 steps.
Just like the rules, templates are also created in close collaboration with each clinic.
Step 4 — Appointments in CHIME
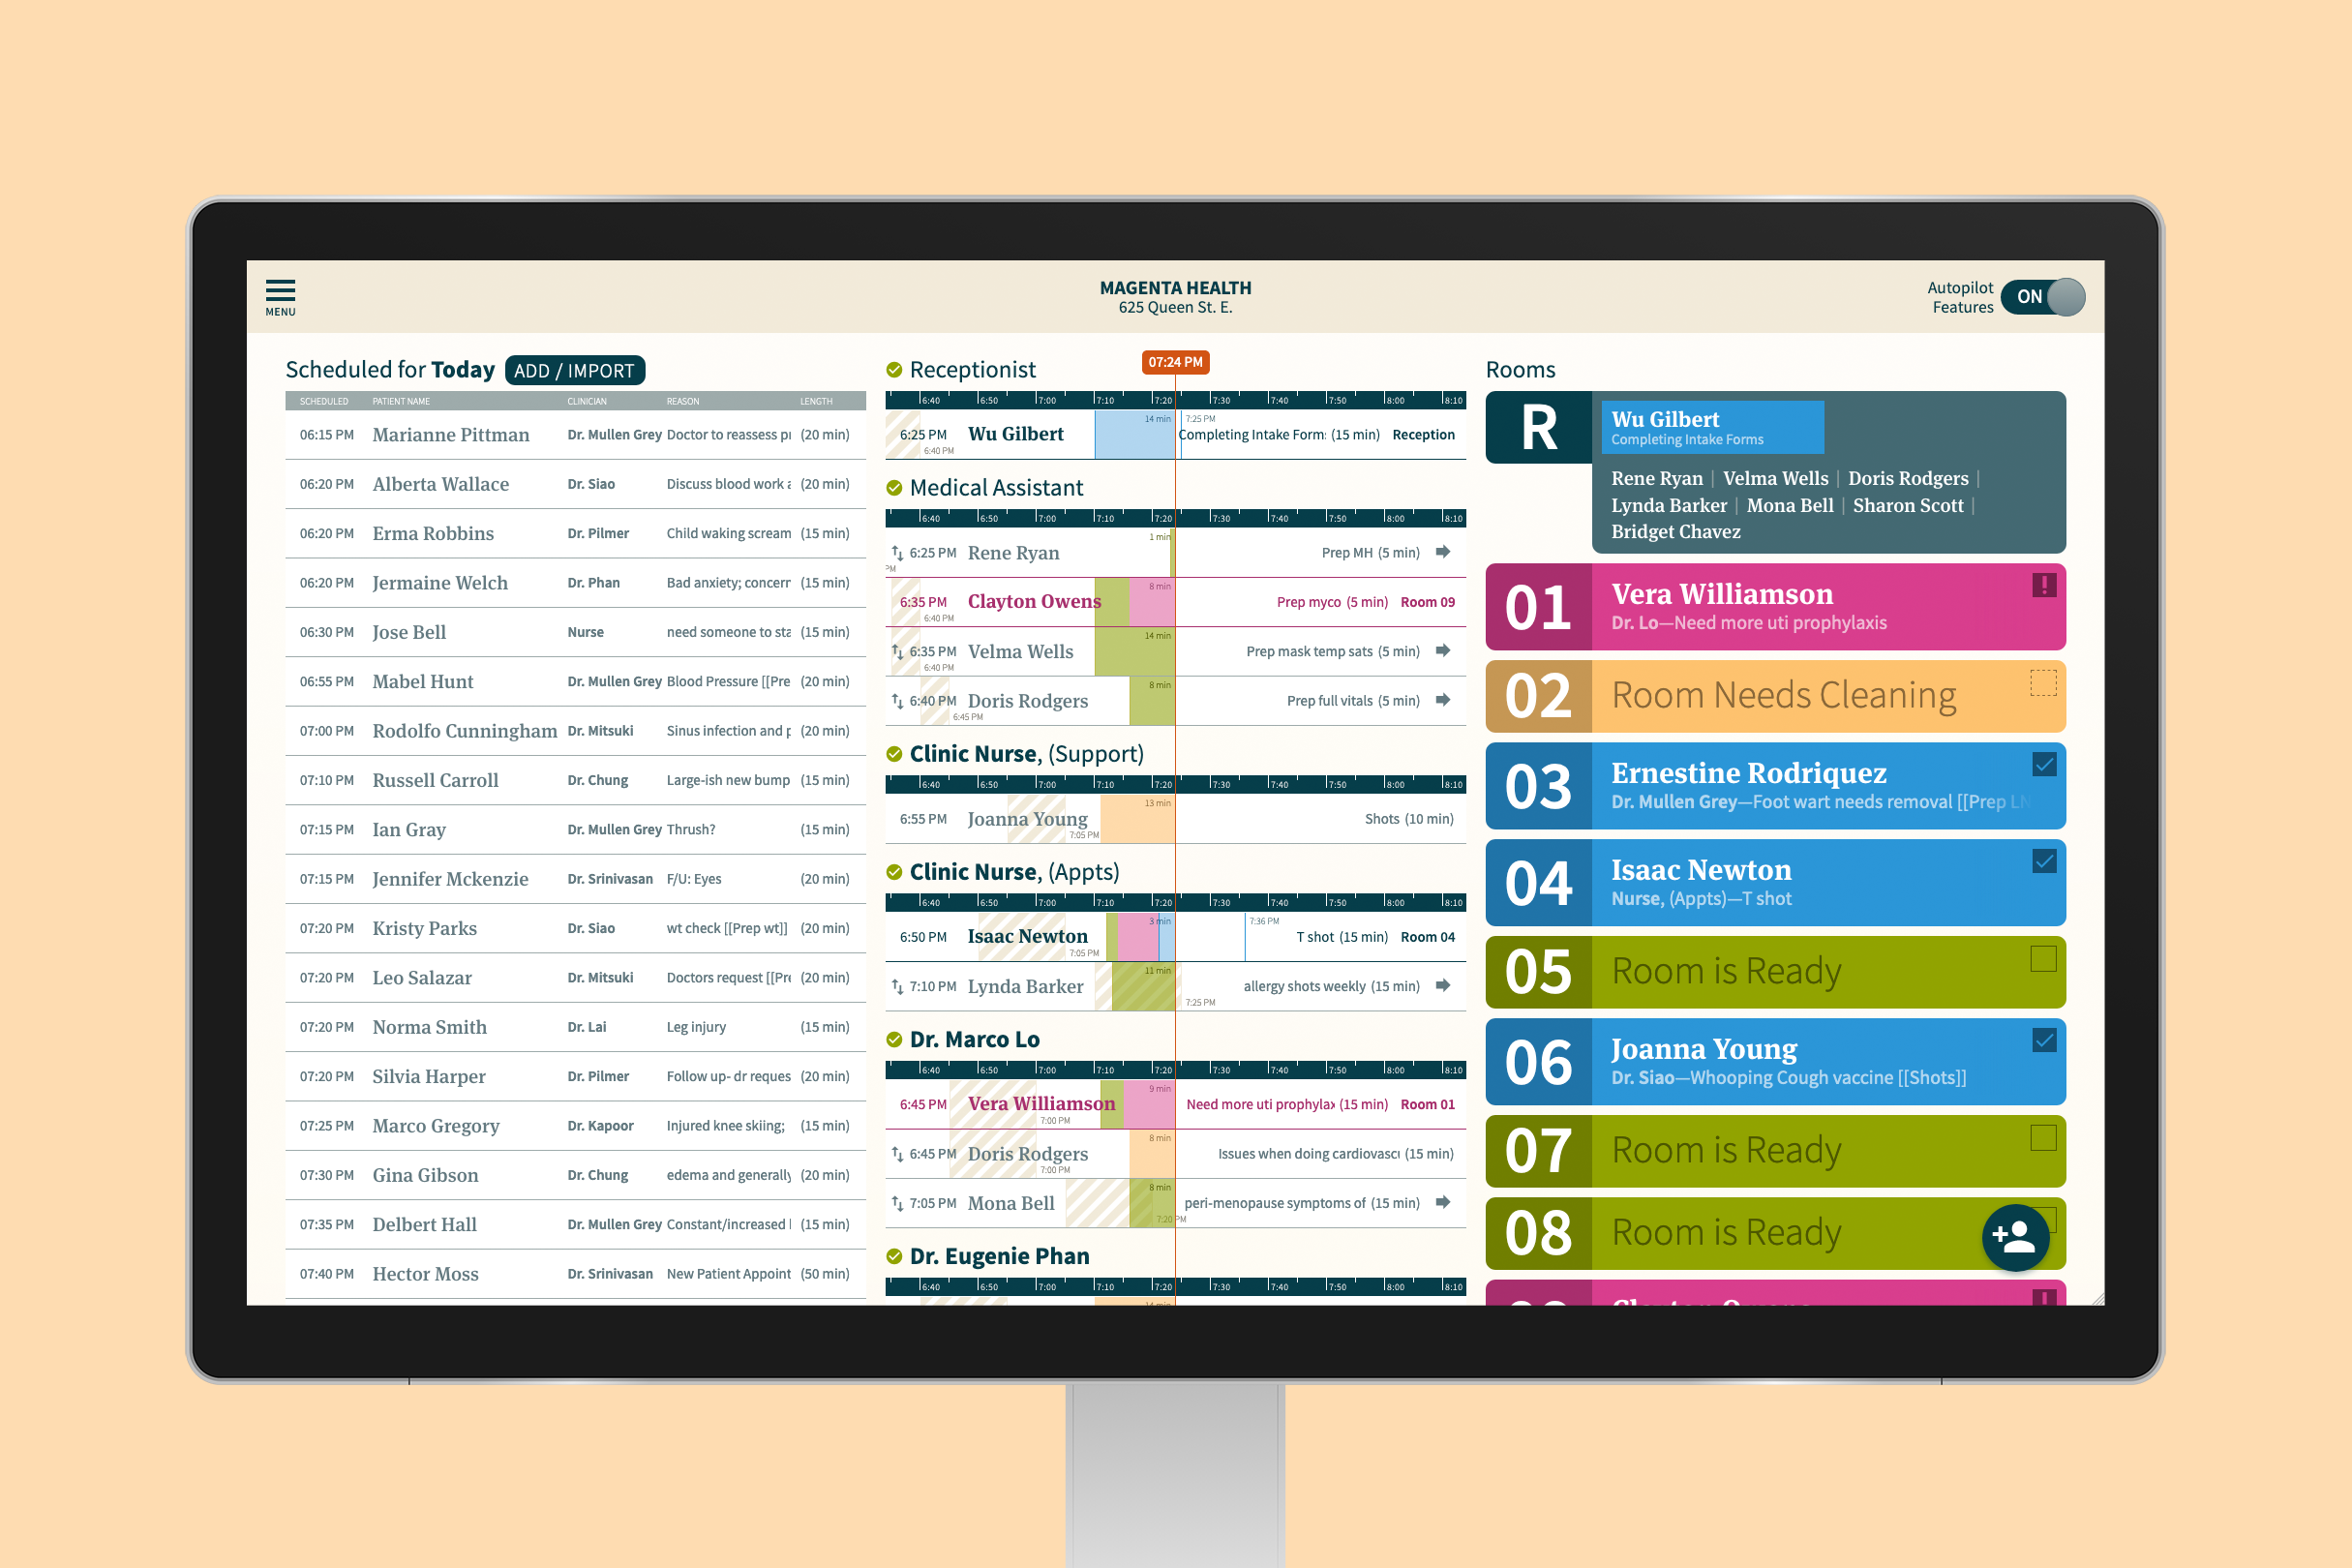
Once each EMR appointment has been examined, rules applied, and a template used, the appointment has been imported into CHIME and will appear in a list on the dashboard.
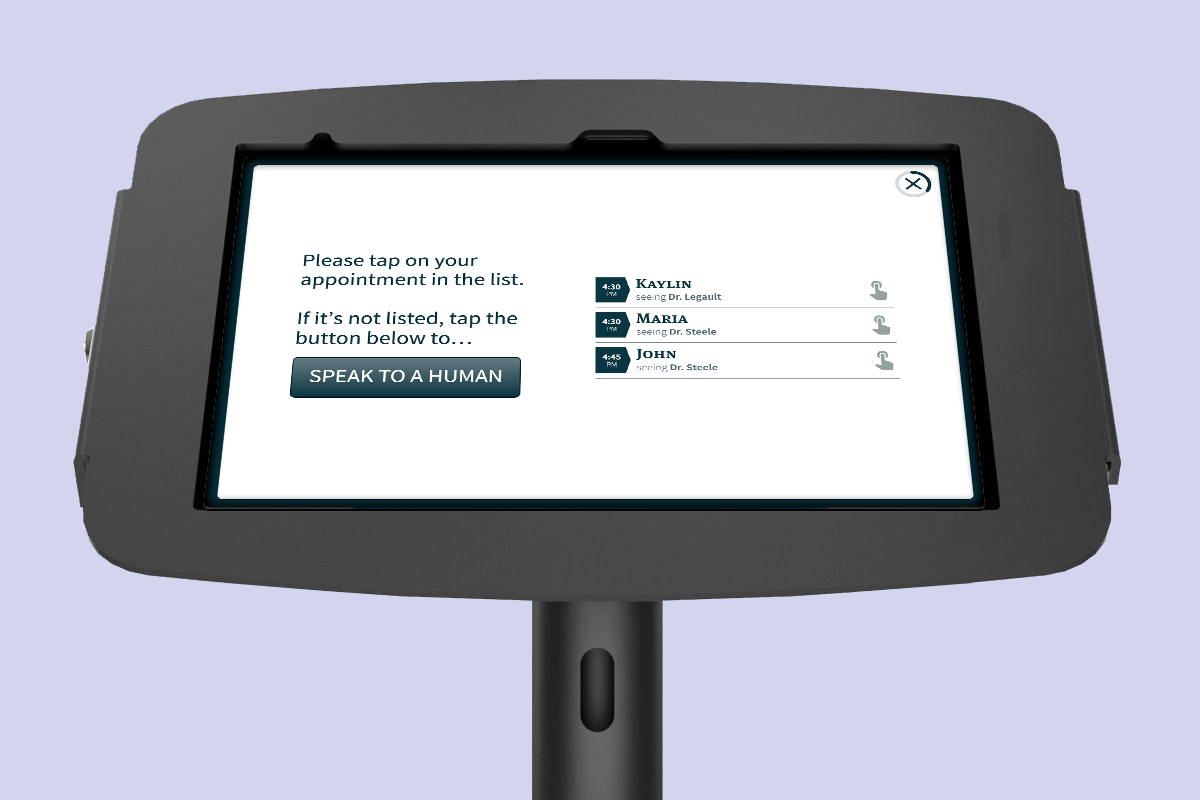
At this point, patients can check-in via a kiosk and/or staff can check in the patient manually.